All Categories
Featured
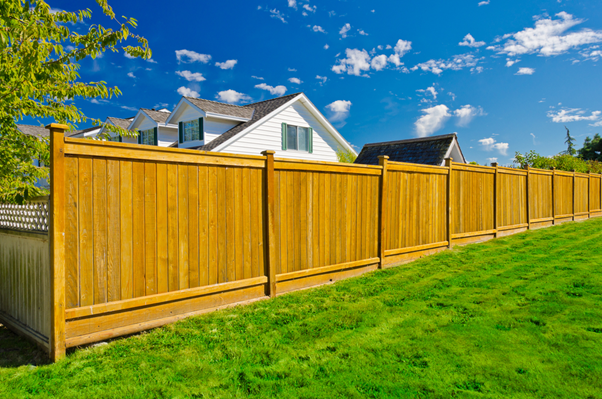
A leaning or harmed fence message can be both an eye sore and a protection concern. Over time, weather conditions, soil shifts, or also the natural aging of materials can cause a fence message to lean or break.
![]()
Shovel. Message hole digger (optional for deeper holes) Degree. Concrete mix (quick-setting is excellent) Gravel (for drain, optional) Sledgehammer or blog post puller (for stubborn blog posts) A 2x4 brace (if enhancing the message) Security safety glasses and handwear covers. Having all these products prepared will certainly make the task easier and quicker.
Concrete: One of the most reliable ways to secure a message is by putting concrete around the base. Mix quick-setting concrete according to the directions on the bag, then pour it around the message, making sure the blog post stays straight and degree.
Crushed rock: If you choose a much easier, much more flexible option, you can use crushed rock around the blog post for far better drainage and support. Fill up the opening with crushed rock, making certain the message is lined up properly. Condense the gravel strongly to keep the message in location. This technique also aids protect against future water damages because the crushed rock will permit wetness to recede from the blog post.
Step 1: Remove the old, damaged message. Use a post puller or sledgehammer to loosen the concrete and eliminate the blog post if the article is established in concrete. Action 2: Once the message is eliminated, dig a brand-new opening if needed. The hole ought to be concerning 2-3 feet deep, depending on the size of your new post and the sort of soil you're functioning with. Step 3: Put the brand-new post into the opening, making certain that it is degree and lined up with the remainder of the fence posts. Tip 4: Fill up the hole with concrete or gravel as described earlier, guaranteeing that the brand-new post is firmly secured. 7. Include Support Dental Braces (Optional) If you're concerned concerning the future stability of the blog post, you can include a support to offer extra assistance. Affix a 2x4 or comparable item of timber to the blog post at a diagonal angle, protecting the other end to a nearby fencing article or the ground. This will certainly avoid any type of future leaning and give the blog post more structural honesty while the concrete cures or gravel clears up.
![]()
Final thought. Fixing a leaning or damaged fence blog post does not have to be a challenging job. By complying with these basic steps-- assessing the damage, excavating around the article, and reinforcing it with concrete or crushed rock-- you can restore your fencing message to its upright placement.
- Analyze the Damages. If your fencing message is leaning, it could simply require to be realigned and strengthened. If the message is rotted, fractured, or broken, it may require changing.
- Collect Necessary Tools and Materials. To repair the post, you'll require a few basic tools and materials:
Shovel. Message hole digger (optional for deeper holes) Degree. Concrete mix (quick-setting is excellent) Gravel (for drain, optional) Sledgehammer or blog post puller (for stubborn blog posts) A 2x4 brace (if enhancing the message) Security safety glasses and handwear covers. Having all these products prepared will certainly make the task easier and quicker.
- Dig Around the Base of the Article. To take care of the leaning post, you'll need to subject the base of the blog post. Begin by excavating around it making use of a shovel. Produce an opening that goes to the very least 12 inches large and 18-24 inches deep. The goal is to loosen the dust bordering the post so you can reposition or protect it properly. If the article is deeply ingrained in concrete, you may require to dig deeper or utilize a blog post puller to remove it.
- Straighten the Message. When the base of the post is subjected, it's time to straighten it. Utilize a degree to guarantee the post is vertical, adjusting it as required.
- Enhance the Message. As soon as the message remains in the appropriate position, you'll require to reinforce it to stop it from leaning once more. You can do this in a number of ways:
Concrete: One of the most reliable ways to secure a message is by putting concrete around the base. Mix quick-setting concrete according to the directions on the bag, then pour it around the message, making sure the blog post stays straight and degree.
Crushed rock: If you choose a much easier, much more flexible option, you can use crushed rock around the blog post for far better drainage and support. Fill up the opening with crushed rock, making certain the message is lined up properly. Condense the gravel strongly to keep the message in location. This technique also aids protect against future water damages because the crushed rock will permit wetness to recede from the blog post.
- If Necessary), change a Damaged Blog Post (. If the message is drastically decomposed or damaged, repairing it may not be feasible. In this case, changing the article is your finest option. Below's how to change a harmed fencing article:
Step 1: Remove the old, damaged message. Use a post puller or sledgehammer to loosen the concrete and eliminate the blog post if the article is established in concrete. Action 2: Once the message is eliminated, dig a brand-new opening if needed. The hole ought to be concerning 2-3 feet deep, depending on the size of your new post and the sort of soil you're functioning with. Step 3: Put the brand-new post into the opening, making certain that it is degree and lined up with the remainder of the fence posts. Tip 4: Fill up the hole with concrete or gravel as described earlier, guaranteeing that the brand-new post is firmly secured. 7. Include Support Dental Braces (Optional) If you're concerned concerning the future stability of the blog post, you can include a support to offer extra assistance. Affix a 2x4 or comparable item of timber to the blog post at a diagonal angle, protecting the other end to a nearby fencing article or the ground. This will certainly avoid any type of future leaning and give the blog post more structural honesty while the concrete cures or gravel clears up.
- Look For Future Stability. When the message is dealt with or changed, inspect it periodically to ensure that it stays upright and secure. Inspect the bordering dirt for disintegration or changing, and deal with any kind of problems immediately to stop more damage.
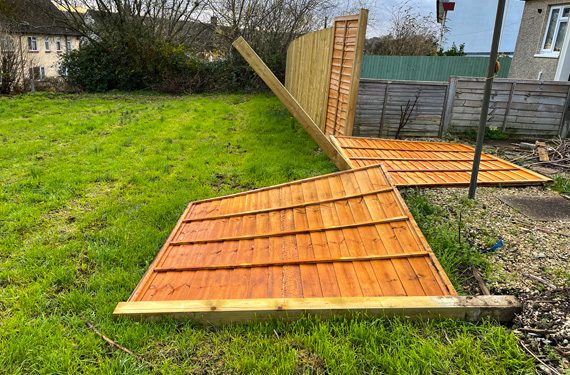
Final thought. Fixing a leaning or damaged fence blog post does not have to be a challenging job. By complying with these basic steps-- assessing the damage, excavating around the article, and reinforcing it with concrete or crushed rock-- you can restore your fencing message to its upright placement.
Latest Posts
Take Advantage of Special Auto Repair Offers in Chicago at Montclare Auto Repair
Published en
1 min read
Secure and Improve Your Home with Weathercraft's Exterior siding Solutions
Published en
1 min read
Explore Budget-Friendly Auto Repairs with Montclare’s Monthly Service Specials
Published en
1 min read
More
Latest Posts
Take Advantage of Special Auto Repair Offers in Chicago at Montclare Auto Repair
Published May 28, 25
1 min read
Secure and Improve Your Home with Weathercraft's Exterior siding Solutions
Published May 25, 25
1 min read
Explore Budget-Friendly Auto Repairs with Montclare’s Monthly Service Specials
Published May 24, 25
1 min read